
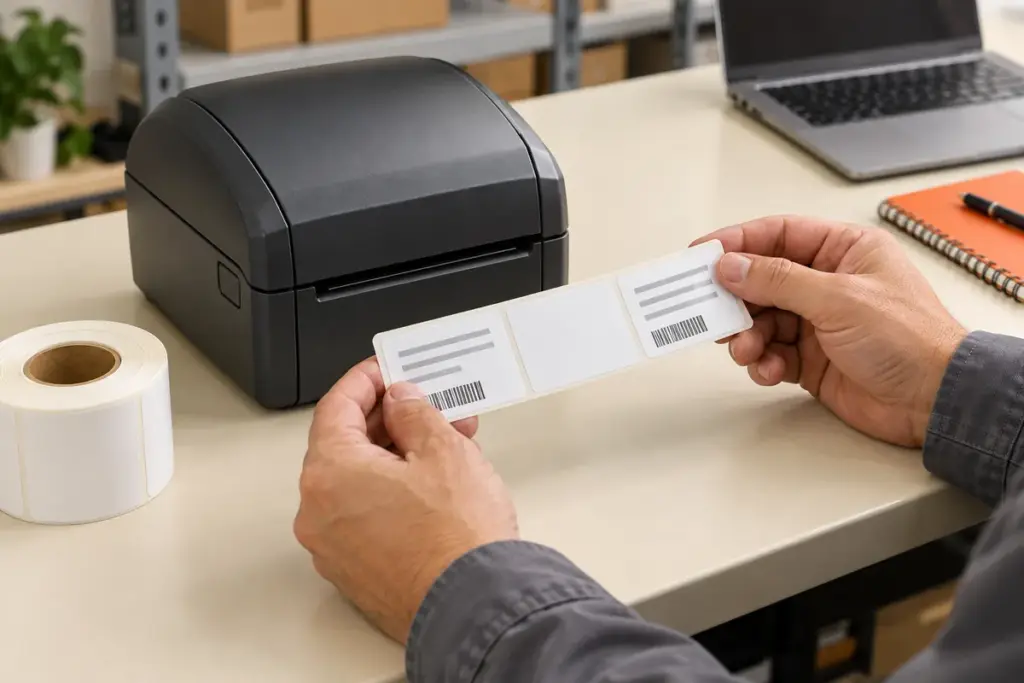
If your label printer is skipping labels, start by checking the loaded media, selected media mode, label dimensions and calibration. Then compare the printer’s feeding behavior with the output from your application. Extra blank pages or settings sent by the software can also produce a pattern that looks like a printer fault.
Work through the checks below one at a time and keep a record of the original settings. The sequence applies to troubleshooting supported label-printing workflows; the actual calibration procedure and available settings depend on the printer model and configuration.
First, Identify What Is Happening
Watch a short, representative print job and describe the pattern before changing anything. Note whether the problem started after changing label stock, selecting a different template or updating software.
| What you observe | What to check first |
|---|---|
| One or more blank labels between printed labels | Media mode, label dimensions, calibration and extra pages or feeds in the job |
| Printing moves progressively up or down the labels | Label length, gap or mark settings, media tracking and calibration |
| Every image has the same fixed displacement | Template position, margins and supported origin or offset settings |
| Media keeps advancing without a repeatable stop position | Loading, supported stock, media sensing mode and calibration |
| Labels feed but all output is blank | Correct thermal media and loading orientation, plus the image or data being sent |
A completely blank image is a different starting point from missing one label between otherwise printed labels. Likewise, a fixed template offset and a progressively changing start position need different checks. Avoid changing several unrelated settings at once.
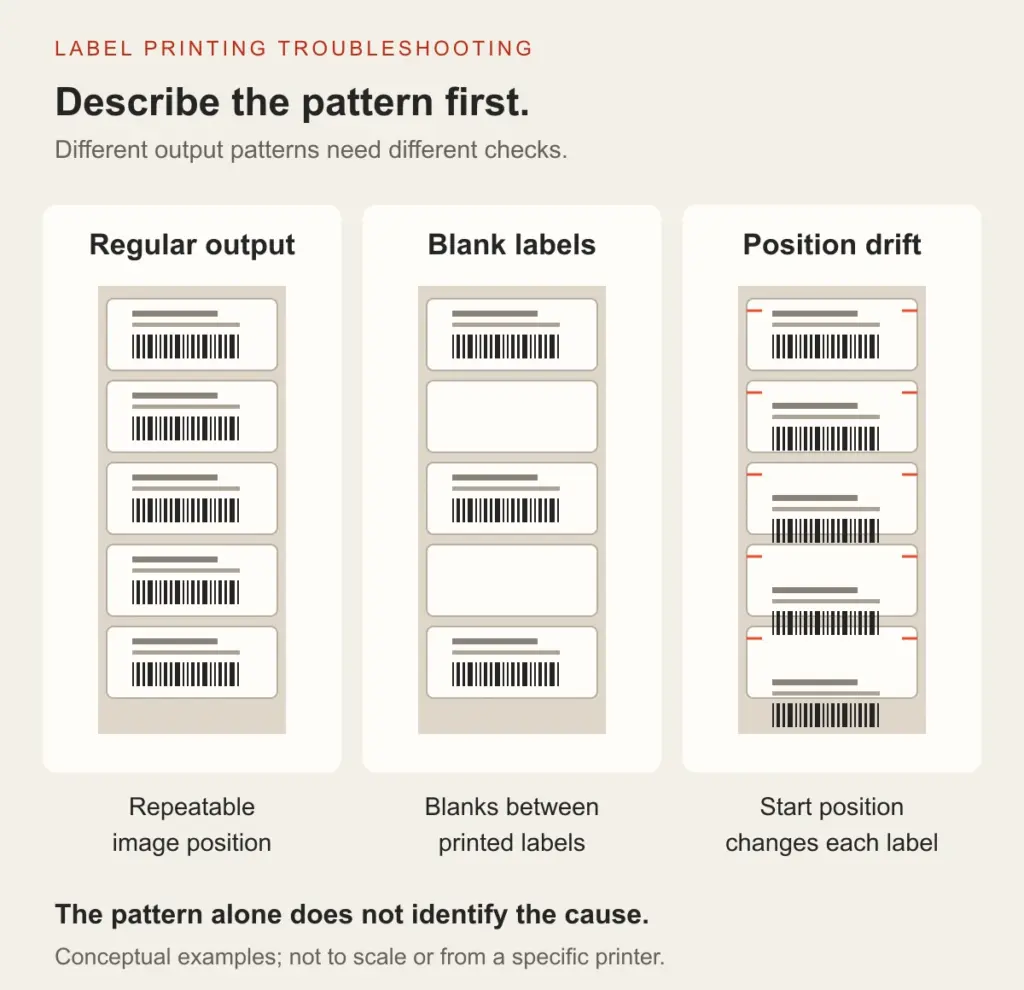
Illustrative output patterns, not diagnostic measurements or samples from a particular printer. Blank labels can also originate in the software print job.
Step 1: Check the Label Supply and Loading
Pause the job so the printer does not continue wasting labels. Before opening the media compartment, switch off and disconnect power and let the printhead cool as directed by the model’s instructions.
Check that the stock is supported, loaded in the correct direction and seated in the intended media path. Close the cover correctly. Position adjustable guides as instructed so the stock tracks without excessive sideways movement or being squeezed.
For external rolls or fanfold supplies, check that the material reaches the inlet without catching on a box, pulling sideways or dragging against another object. Remove loose scraps from accessible areas using the maintenance procedure for the model. Stop and seek support if there is a damaged component or an obstruction that requires dismantling.
Loading and an unobstructed paper exit are also part of the checks in Brother’s printer troubleshooting guidance. Use the instructions for your own printer when inspecting or cleaning it.
Step 2: Match the Media Mode to the Stock
Look at a spare piece of the stock and its liner. Gap labels have individual label boundaries separated by a gap or another supported registration feature. Black-mark stock uses registration marks, commonly on the reverse. Continuous stock does not provide the same individual label boundaries.
Select the media mode supported by both the stock and the printer. Roll and fanfold describe how material is supplied, rather than proving whether gap or black-mark detection is appropriate. Also check the selected command or operating mode when the model supports both receipt and label printing.
Inspect only the accessible sensor area identified in the model’s instructions. If the printer has an adjustable sensor, follow the specified alignment procedure; some sensors are fixed. Clean with the method and materials approved for the model rather than assuming that every sensor can be moved or cleaned in the same way.
Step 3: Compare Physical Label Dimensions with Software Settings
Measure the actual stock and compare it with the label definition in the application and driver. Check width, label length, units, orientation and the required gap or black-mark settings. Confirm how the software defines label height and gap, so the gap is not accidentally counted twice.
A template for a different stock length can produce extra feeding or an image that crosses label boundaries. A document containing blank pages can also result in unused labels between printed output. Inspect the complete preview or source file, including its page count.
For PDF workflows, check whether the source is a label-sized page or a label placed inside an A4 or Letter page. Match the export and print settings to the intended stock. Scaling the artwork is a separate question from making the paper feed recognize the correct label boundaries.
If you are choosing stock or checking the usable image area, our 4-inch thermal shipping label printer guide explains label width, liner width and effective printing width.
Step 4: Calibrate Using the Procedure for the Model
Media calibration helps the printer establish how to recognize the loaded stock and position label output. Check the model’s instructions when changing the label size, material or sensing type, or when previously consistent registration becomes unreliable.
Load suitable media, select the correct media mode and use the calibration option documented for the exact printer and firmware. It may be available through a supplied utility, menu or a specified button sequence. Allow the documented process to finish; calibration can advance media as part of its measurement.
There is no single Feed-button timing or command sequence that should be applied to every thermal label printer. Ask Uright Tech for the correct method if the instructions for your configuration are unavailable. Record the model, firmware if known, stock details and selected mode.
Manufacturer troubleshooting, including Zebra’s guidance on changing print position, identifies calibration as a relevant check. Its model-specific procedures should not be copied directly to other equipment.
Step 5: Compare Feeding with the Application’s Print Job
After the loading and media settings have been checked, use the model’s normal feed function as documented and observe whether stopping positions are repeatable. Then send a small, simple label job through the actual application. Note which operation introduces the unwanted blank labels or position changes.
If feeding is repeatable but the problem appears when a job is sent, look first at the application’s page size, driver media settings, command mode and any extra feed or blank-page content. If feeding is already inconsistent, revisit the loading, stock, sensing and calibration checks. These observations guide the next investigation rather than proving a single cause.
Settings can be applied from more than one place. A printer may appear correctly configured until a driver or application sends a different label definition. Zebra documents this kind of software override for its desktop printers. Compare the settings used by your own printing path and ask the software provider about job-level configuration where necessary.
Change one relevant item at a time and repeat the same small job. Keep copies of the working template and settings once the output is consistent. A factory reset or firmware change should be a model-specific support step, with the existing configuration recorded first.
Step 6: Separate Registration Problems from Layout Offsets
Once the printer feeds consistently, review the position of the artwork. A repeated displacement by the same amount may call for a template, margin or supported origin adjustment. A start position that changes across successive labels calls for a fresh review of label dimensions, tracking, job settings and media registration.
Increasing print darkness does not establish the correct label length or sensing mode. Similarly, moving an image offset should not be used to hide ongoing skipping. Confirm the feed and label definition first, then refine the layout within the usable print area.
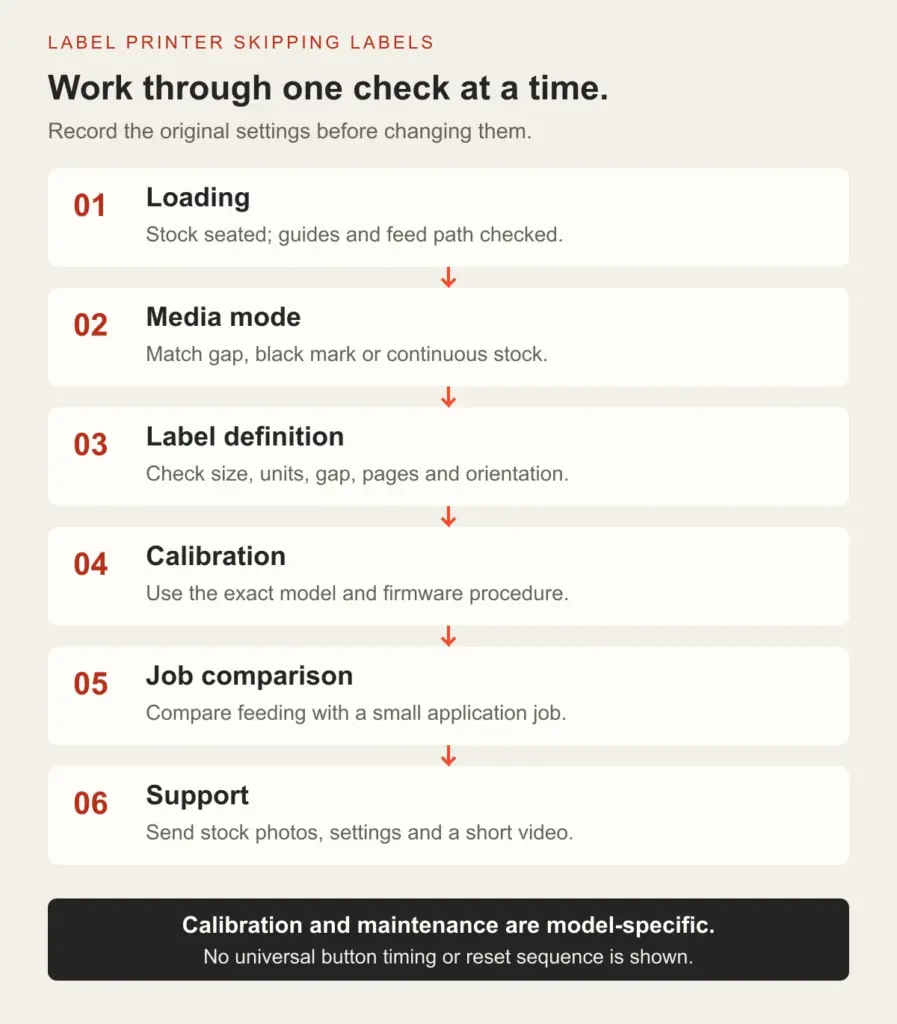
Suggested investigation order. Repeatable feeding and consistent job settings both need checking; use model-specific instructions for calibration and maintenance.
What to Send Uright Tech If the Problem Continues
The following details help us understand the printing path and suggest the next step:
- Printer model, selected connection and firmware version if available.
- Photos of the label face, liner reverse and the loaded media path, taken with the printer safely stopped.
- Actual stock dimensions, label length, gap or mark details, and roll or fanfold format.
- Screenshots of the application page size, driver media settings and selected operating mode.
- A sample label file with personal or customer information removed.
- A short video of the feed or print pattern, plus whether the issue began after changing stock, templates or software.
Email [email protected] or contact Uright Tech on WhatsApp with those details. Indicate what you have already checked so the investigation can continue from that point.
Relevant Uright Label-Printing Products
For existing installations, start with the documentation and configuration of the printer you have. Skipped labels alone do not establish that a replacement printer is required.
The UR-4260 and UR-4250 list compatible direct thermal media options and gap, black-mark and other detection functions. Match the selected stock and operating mode to the actual configuration.
The UR-3006 mobile label and receipt printer lists continuous thermal paper, gap-label and black-mark media support. Its receipt and label workflows require suitable media and application settings. Do not transfer a desktop model’s procedure or label format to it without checking the requirements.
For installation planning, explore Shipping Labels & Logistics Printing or Mobile Printing. Our desktop vs mobile label printer guide covers the choice of working arrangement.
Frequently Asked Questions
Why Does My Printer Skip Every Other Label?
Check the label definition and the complete print job for a different stock length, a gap-setting mismatch, blank pages or extra feed commands. Also confirm the media mode and calibration. The pattern alone does not identify one universal fault.
Why Does It Start Skipping After I Change the Roll?
Compare the new stock’s size, sensing features and physical properties with the previous supply. Check loading and media mode, then follow the documented calibration procedure where required.
Can the Driver Override Printer Settings?
It can, depending on the software and printing method. If the behavior changes only after a job is sent, compare application, driver and job-level settings rather than checking the printer configuration alone.
Should I Hold the Feed Button to Calibrate?
Use the procedure for your exact model and firmware. Button sequences and their effects vary. Contact Uright Tech if you need the appropriate instructions for your configuration.
What If All Labels Come Out Completely Blank?
Check compatible thermal media, loading orientation and whether printable content is being sent. A continuous lack of an image needs a separate imaging and data-path investigation, even if a media-feeding problem is also present.